


Contact our support team for more information.
Viewport Selection allows administrators to pre-assign Viewport Types to specific View Types, ensuring the correct view titles (or no titles at all) are automatically applied whenever a view is placed on a sheet. This removes the need for users to manually reassign viewport types after placement, eliminating a common source of graphical inconsistency.
Viewport Selection is not limited to only views, but also allows assigning Viewport Types to schedules, legends, renderings, and walkthroughs.
Revit seems to have its own methods for defining a “default” Viewport Type, requiring the Viewport Type to be changed after placement of the view. Reassigning a “default” Viewport Type to views requires a convoluted process. In addition, this “default” Viewport Type is assigned to all View Types moving forward, regardless of the type of view, creating graphical inconsistency in how the view titles are displayed.
Many firms have several viewport types for specific view types. It is a common issue for views to default to the last used viewport type. This often goes unnoticed until a final pass-through before printing. Viewport Selection can prevent this all together and help you maintain consistent graphical standards.
Viewport Selection solves this by automatically applying the correct viewport type at the moment views are placed on sheets, with no manual intervention required from the end-user.
Once enabled, the setting is applied to all registered models with that Project Configuration assigned. To disable Viewport Selection for a specific model, go to Model Settings > Model Overrides and uncheck the Viewport Selection checkbox.
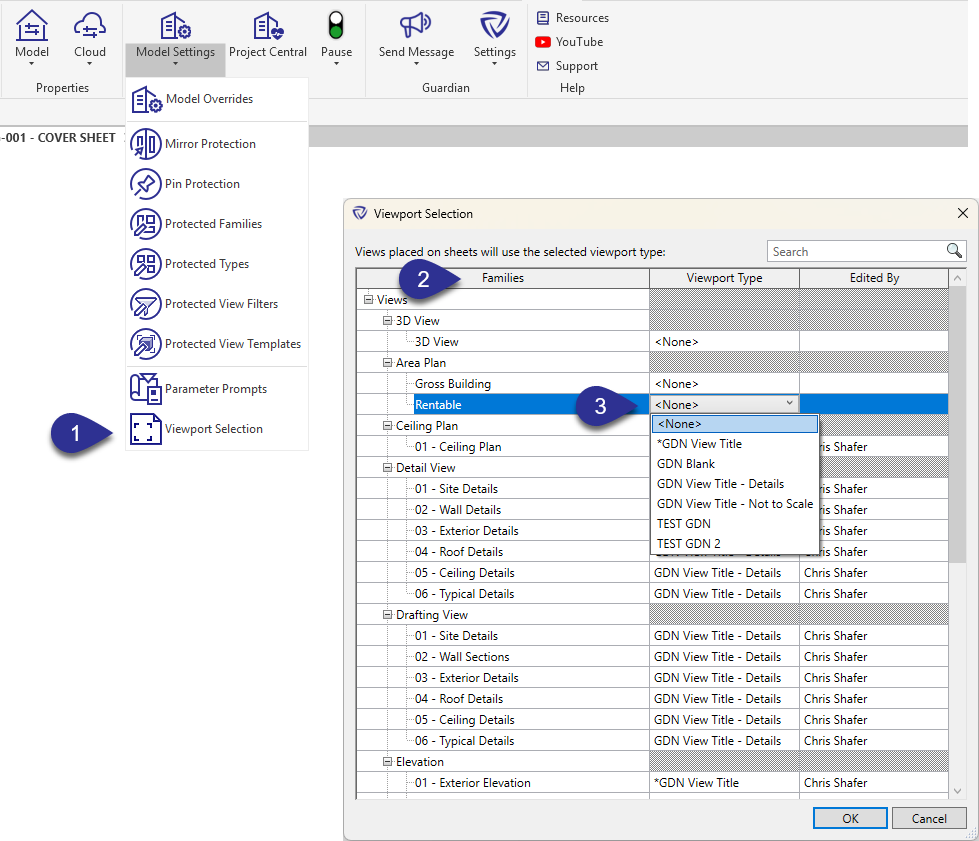
Once a viewport type is assigned, the name of the admin who applied or last edited the assignment is recorded and displayed in the dialog.
Pro Tip: Set the Viewport Type to None for any view types that do not require a view title, such as schedules or legends.
Pro Tip: Pre-assign viewport types to view types within your firm’s Revit templates. When a project is started from that template, the Viewport Selection settings will be adopted automatically.
Viewport Selection works entirely in the background. When an end-user places a view on a sheet, the pre-assigned viewport type is applied automatically. No additional steps, prompts, or decisions are required from the user beyond their normal process for placing views on sheets.
Contact our support team to receive personalized assistance.
