Clean Your Content with Guardian's Content Car Wash
Guardian’s Content Car Wash is a repeatable process for cleaning and standardizing Revit content using Guardian’s Model Properties. This is a great process to follow when you:
Are cleaning an existing content library
Are standardizing families from multiple sources
Are preparing content for a shared library or content management system
Want to reduce inconsistencies in project graphics and data
This process uses your Revit template as the source of truth, allowing Guardian to map incoming content to approved standards and reuse those mappings in future projects.
Click Review Changes to process and apply the mappings
Tips:
Use the assigned mapping configuration as your master cleaning configuration
Do not use this same mapping configuration for live projects
After cleanup, duplicate it and assign the new version to projects
Step 3: Create a Family Cleanup Model
Create a dedicated Revit model used specifically for cleaning content. This acts as your “car wash environment” where families are cleaned before being added to your library.
How to do this:
Create a new .RTE file from your cleaned project template
Remove project-specific elements such as views and sheets
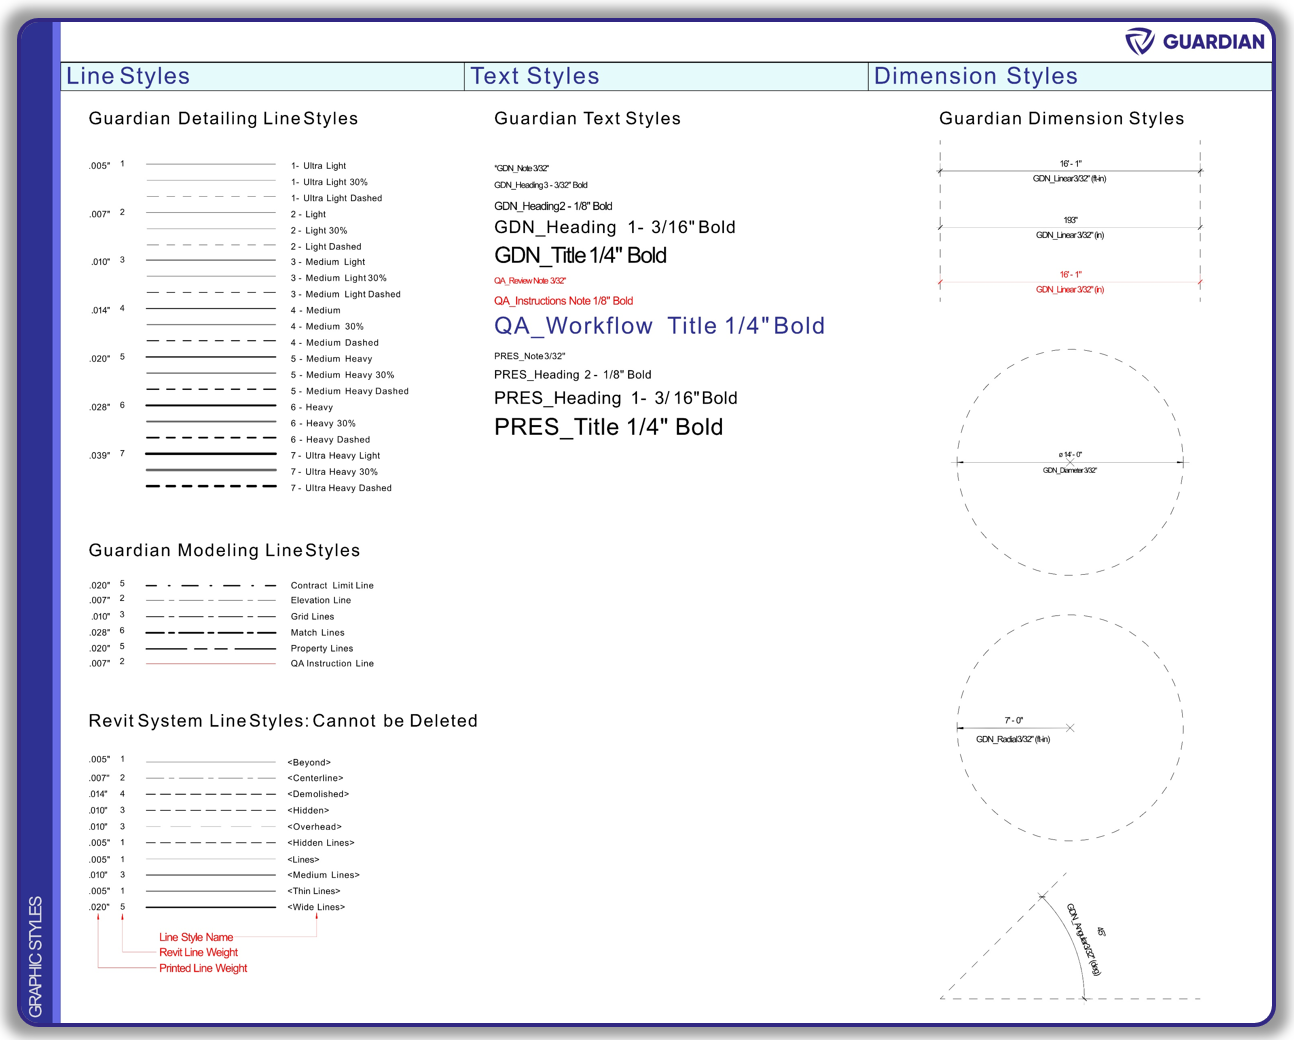
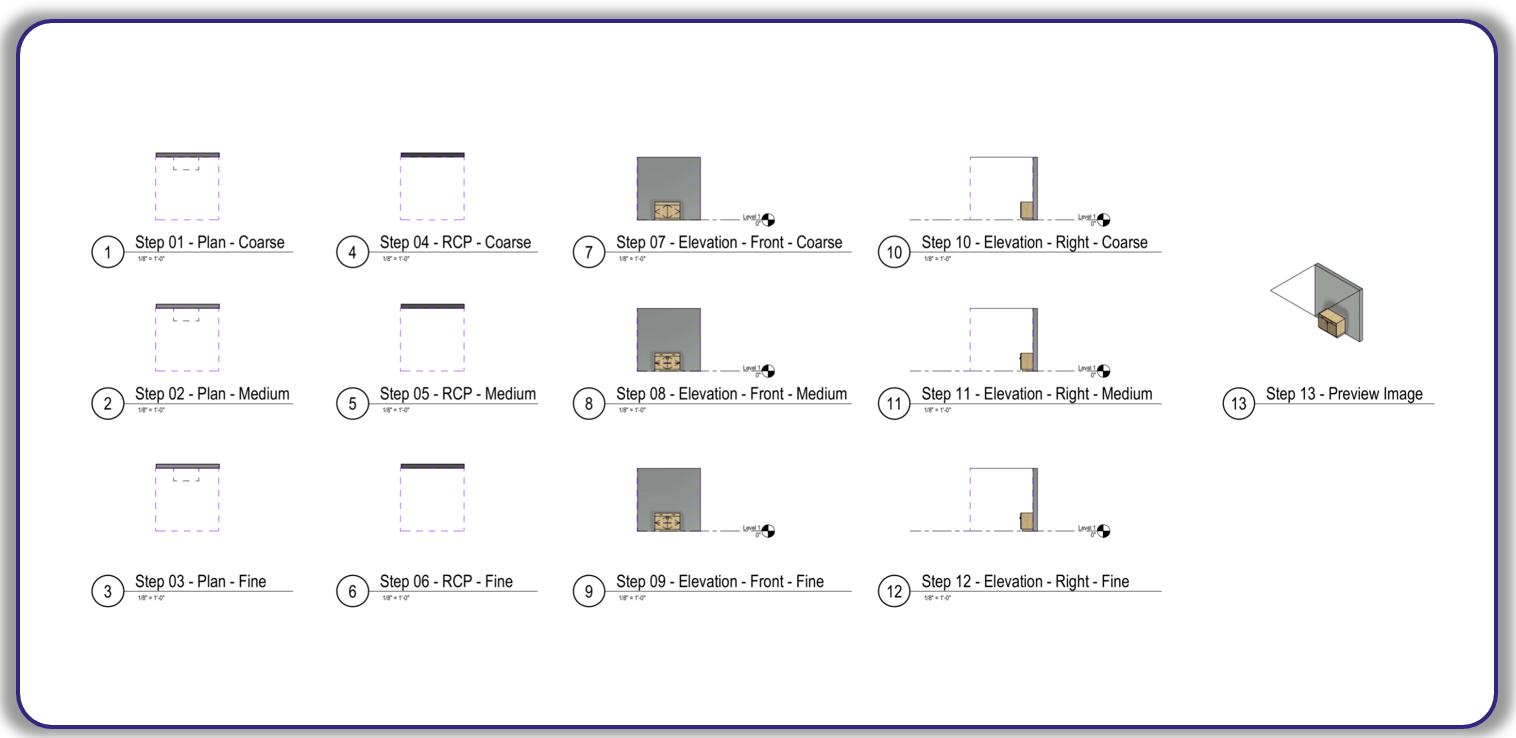
Create three versions of a plan view, reflected ceiling plan view, front elevation and right (or left if you prefer) elevation, with each of the three versions set to fine, medium or coarse detail level. Also create a 3D view. This is to ensure your families are being graphically represented across all views found within Revit.
Save this as your Family Cleanup Model
Step 4: Clean Your Content
This is the core step where content is cleaned and standardized using Guardian.
How to do this:
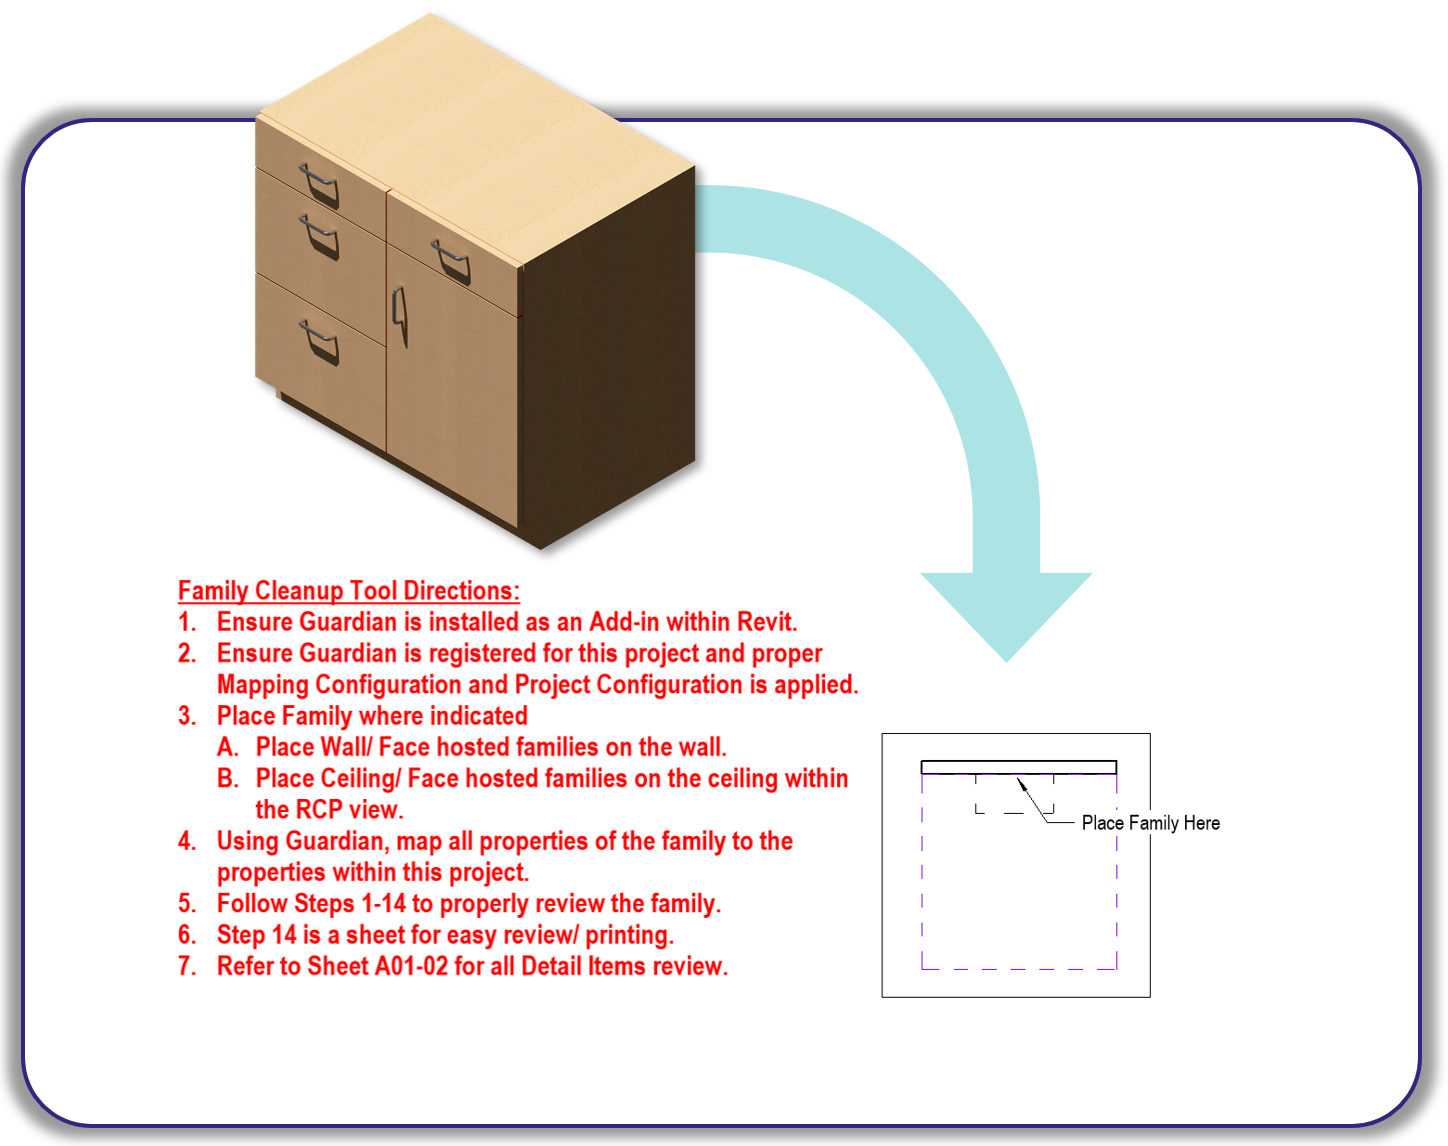
Open your Family Cleanup Model (from step 3)
Load or insert families into the model
Start with a couple “base” families for each category/type
Allow Guardian to process the content
When prompted, review the Incoming Properties dialog
Compare incoming properties against your standards
Map non-standard properties to approved ones
Rename or consolidate families and types as needed
Remove unused properties through Guardian
Tips:
Start with small batches of families, 50-100 at a time
Complex families (ex: doors, casework) may require additional review
Guardian will learn mappings as you go, speeding up future processing
Check the Export button to save cleaned content back to its original source location
Step 5: Create a Content Container
Create a centralized model that contains your cleaned content. This allows you to view all content in one place, identify duplicates and inconsistencies, and review standards at scale.
This model will be your ongoing source of truth for content and standards moving forward.
Over time as you become more confident with Guardian, you can skip the Content Car Wash Template and load families directly into the container, as Guardian will ensure your standards are safeguarded.
How to use it:
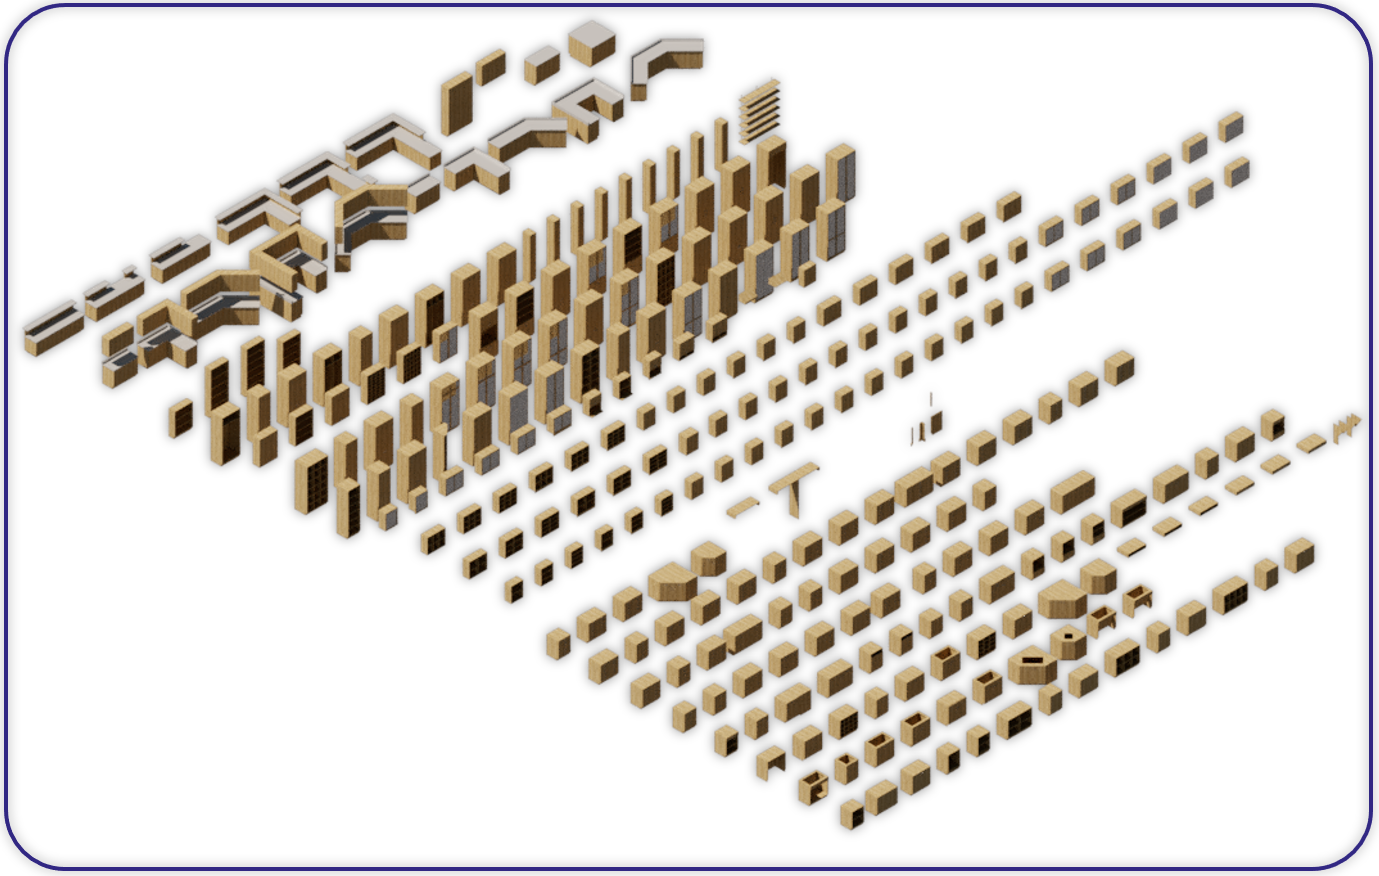
Load multiple cleaned families into a single Revit model
Review incoming properties across all content
Identify patterns, duplicates, and inconsistencies
Resolve standards globally instead of family-by-family
Step 6: Export and Publish Clean Content
Once content is cleaned and standardized, export to your content management solution
Use Guardian Sync Properties to push your finalized standards to the cloud, ensuring consistency across future projects
Tip: Saving families directly from Revit (instead of the family editor) can reduce file size.