Label Manager provides a structured way to organize and classify projects in Guardian. Label Manager works with Registered Projects to provide a scalable system for organizing project data across your firm. In conjunction with Guardian Backstage, Labels become the foundation of your project data architecture.
Label Manager provides company administrators with the ability to:
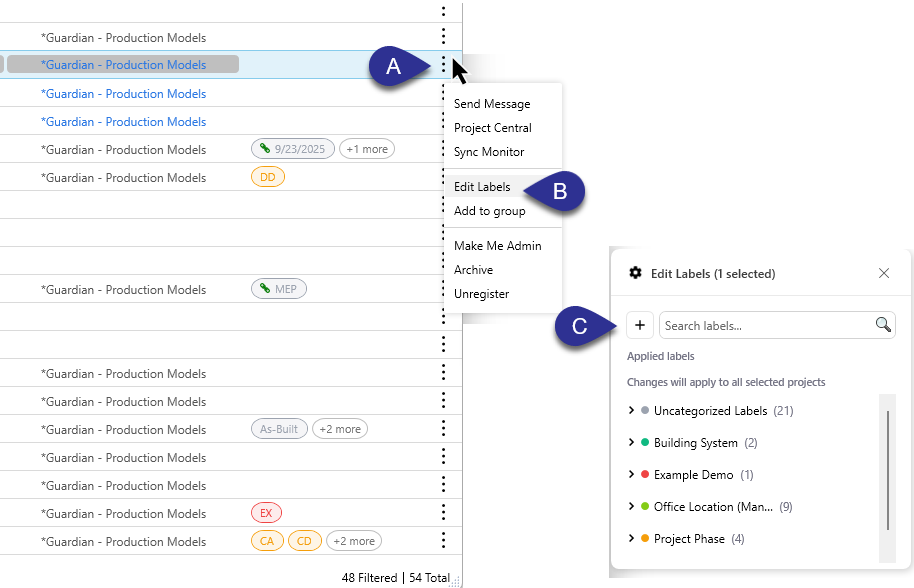
In Registered Projects, open the kebab menu for a model, or right-click the row
Select Edit Labels
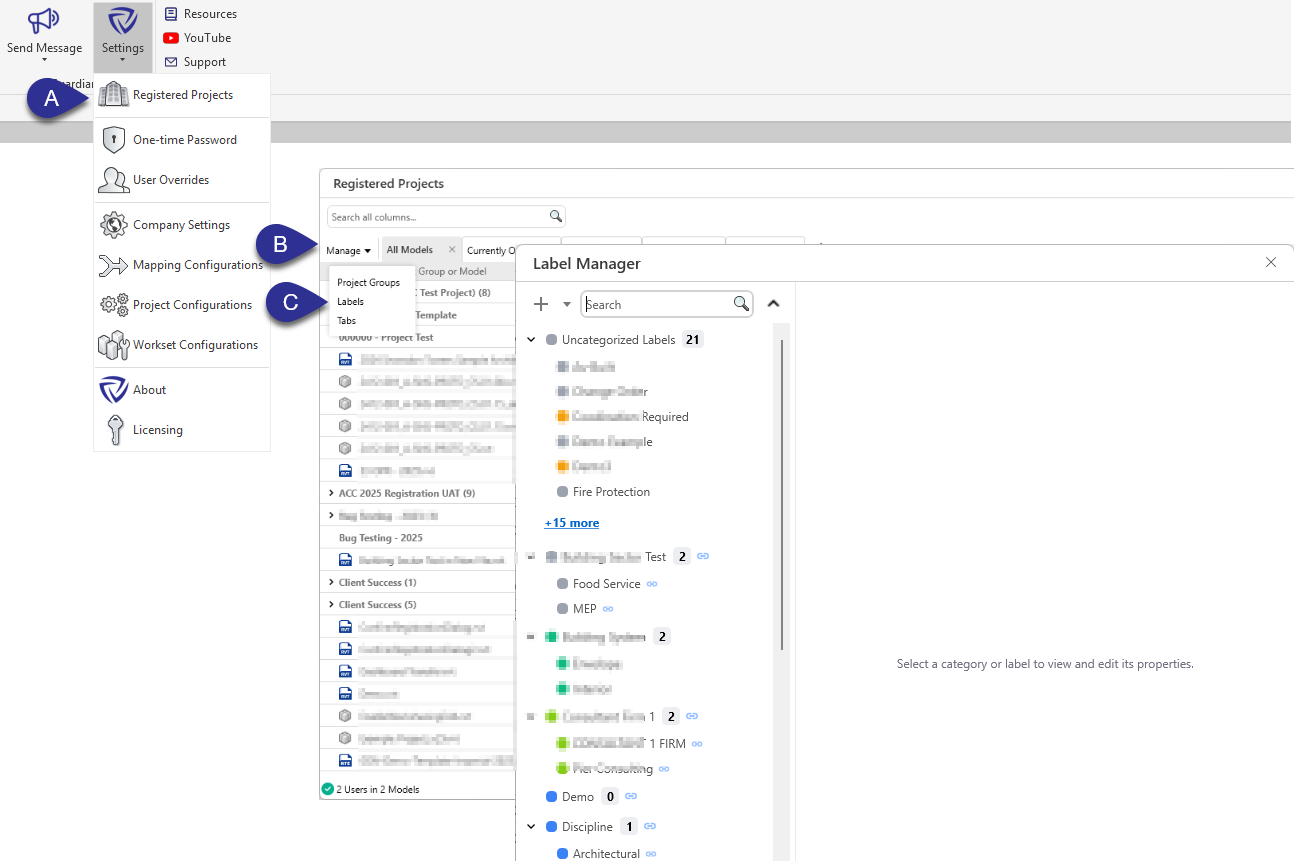
Click the Settings cog in the top-left corner
Create and Manage Label Categories and Labels
Labels can be created in two ways.
Manually: To manually create both the Label Category and individual Labels.
Automatically: Uses Project Information Shared Parameter to create the Label Category and reads the associated value from the project model to create the individual Label.
Label Categories define groupings of Labels within Guardian and help organize Labels and your project data architecture consistently across your firm.
For example:
Category: Region
West
Central
East
Category: Design Phase
Schematic Design
Design Development
Construction Document
Tip: Examples of Label Categories include region, phase, discipline, project type, or template.
Manually Creating and Managing Label Categories and Labels
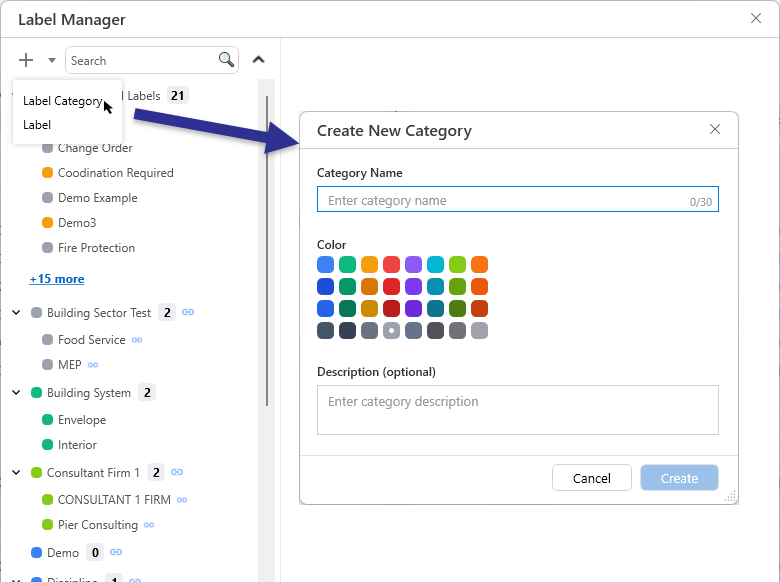
Create a Label Category
Click the plus sign (+) in the top-left corner
Select Label Category
Enter the category name
Select a label category color
Optionally, enter a description
Click Create
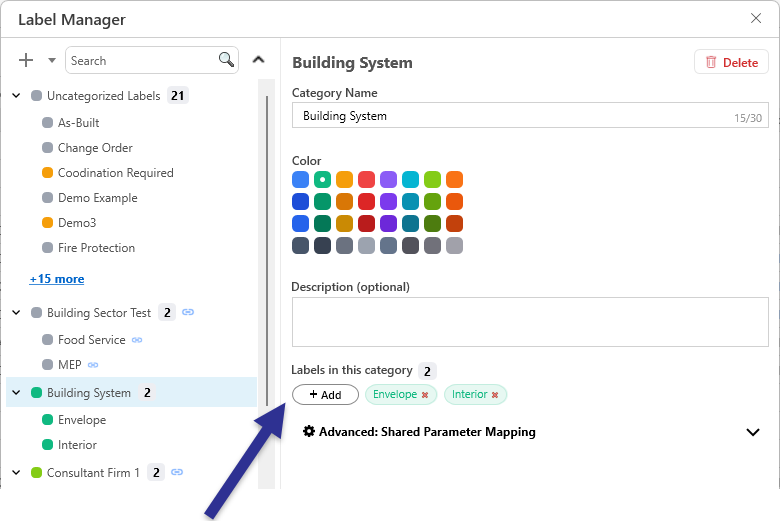
Edit or Delete a Category
Select the category from the list
Edit the name, color, or description
You can also update which labels belong to the category
To delete the category, click Delete in the top-right corner
Create a Label
Click the plus sign (+) in the top-left corner
Select Label
Choose the label category
Enter a label name
Select a label color
Optionally, enter a description
Click Create
Note: For non-shared-parameter mapping label categories, labels can also be created by selecting a Label Category and clicking Add under Labels in this category.
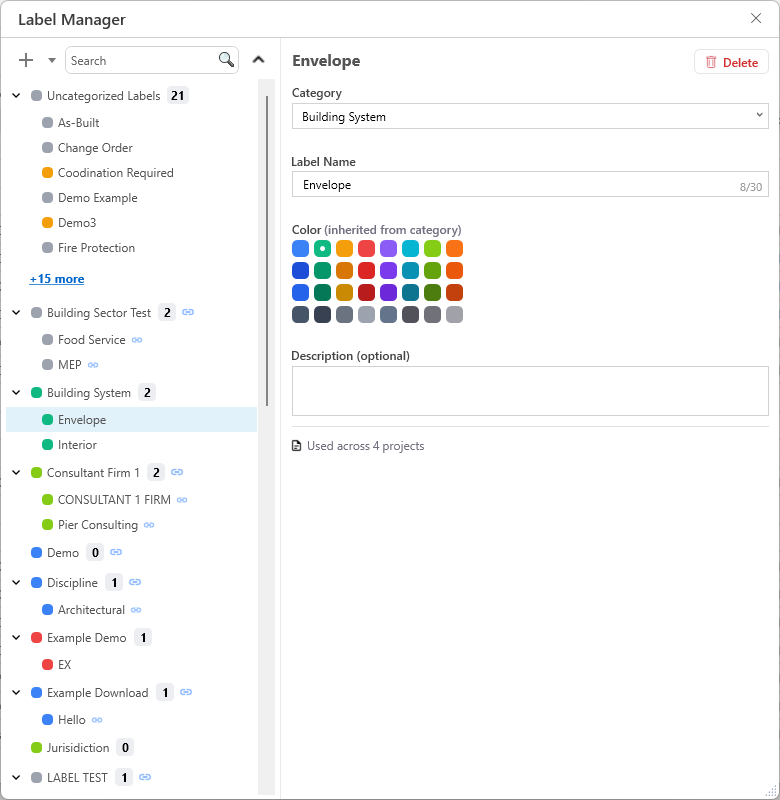
Edit or Delete a Label
Select a label from the list
Update the category, name, color, or description
To delete the label, click Delete in the top-right corner
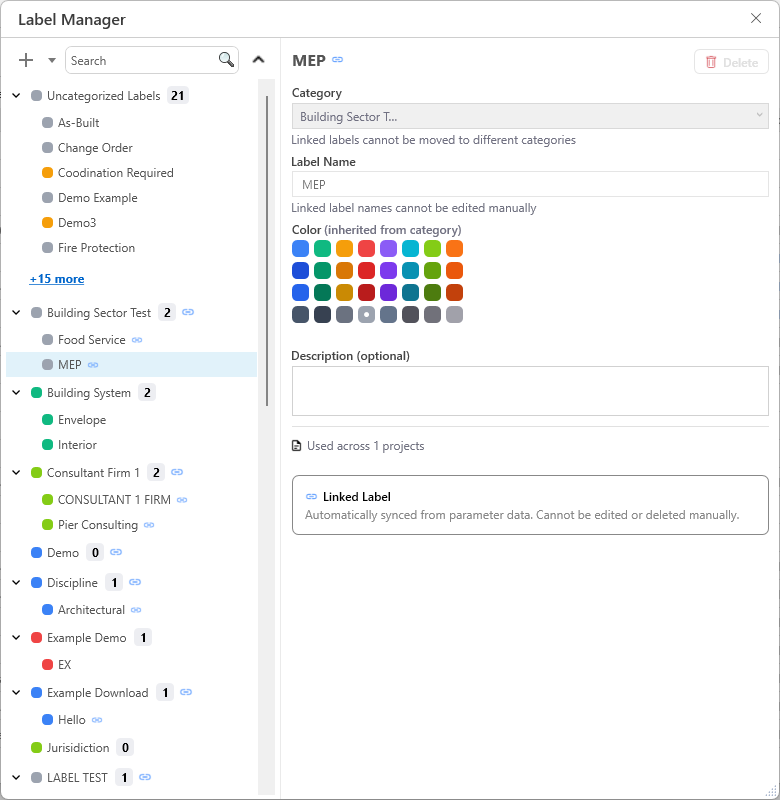
Note: Linked labels cannot be edited or deleted manually in Label Manager.
Automatically Creating a Label Category and Labels
Label Manager provides the means to create metadata-driven labels by linking a Label Category to a Project Information Shared Parameter in your Revit projects.
This enables Labels to be automatically assigned to models within Registered Projects based on the value assigned to the Project Information Shared Parameter within the given model.
Linked Label Requirements
Before creating an automatically linked Label Category and Label, please ensure the following:
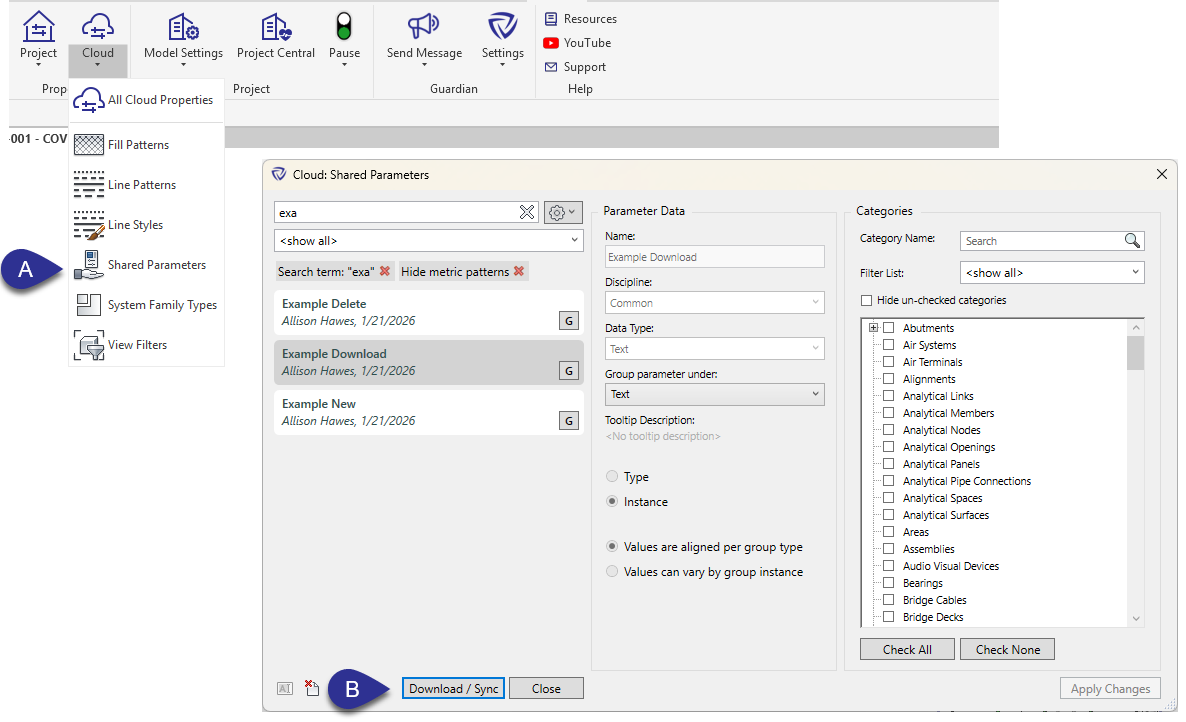
The Shared Parameter you wish to use as a Label Category has been added to your Revit Template and/or Project Models as a Project Information parameter.
Open the Revit Template or Revit model with the Shared Parameter assigned as a Project Information parameter
Go to Add-Ins > Guardian > Project > Shared Parameters (A)
Select the Shared Parameter from the left sidebar
Ensure the Parameter Data and Parameter Categories are properly set
Click Upload/Sync (B)
Link an Existing Shared Parameter
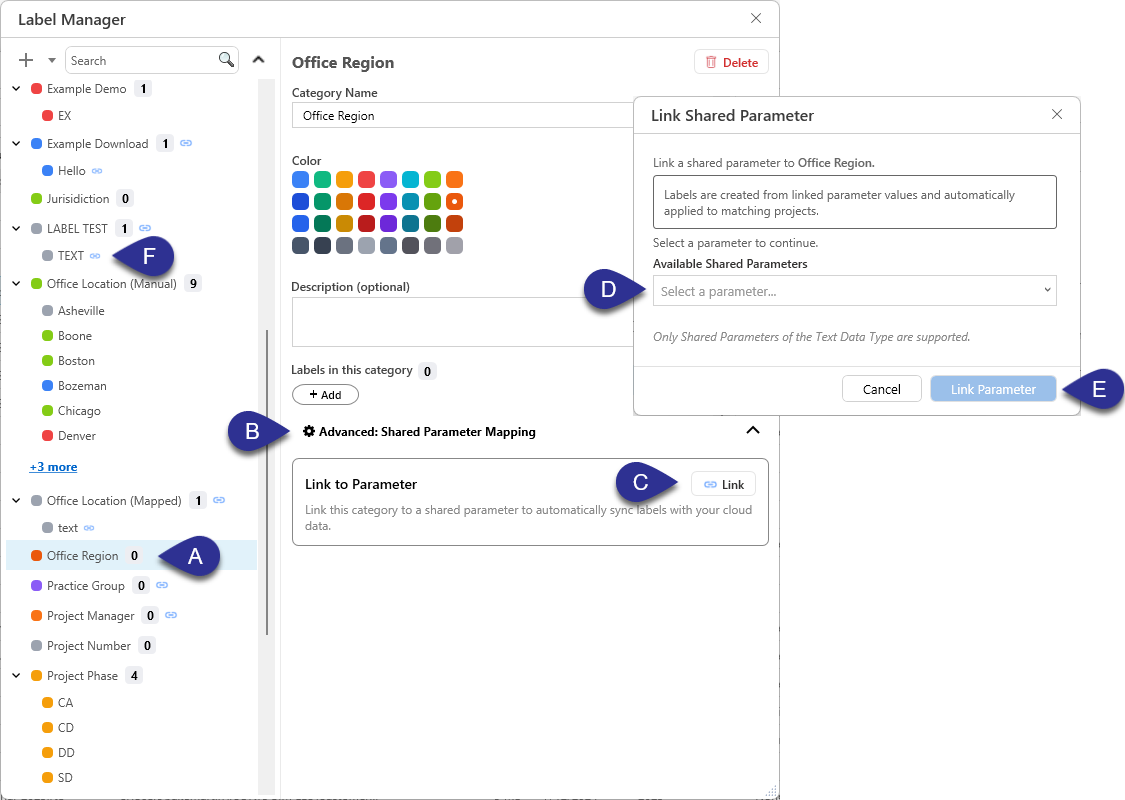
Create a new Label Category
Note: this should match the name of the Shared Parameter to be added
Select the new Label Category (A)
Expand Advanced: Shared Parameter Mapping (B)
Click Link (C)
In the Link Shared Parameter dialog, select the parameter from the dropdown (D)
Click Link Parameter (E)
After linking, the linked parameter icon (F) appears next to the label in the left panel
Once linked, individual Labels will be automatically created from the parameter values assigned within project models that have the Project Information Shared Parameter. Those values will be automatically assigned to those project models and appear in Registered Projects.
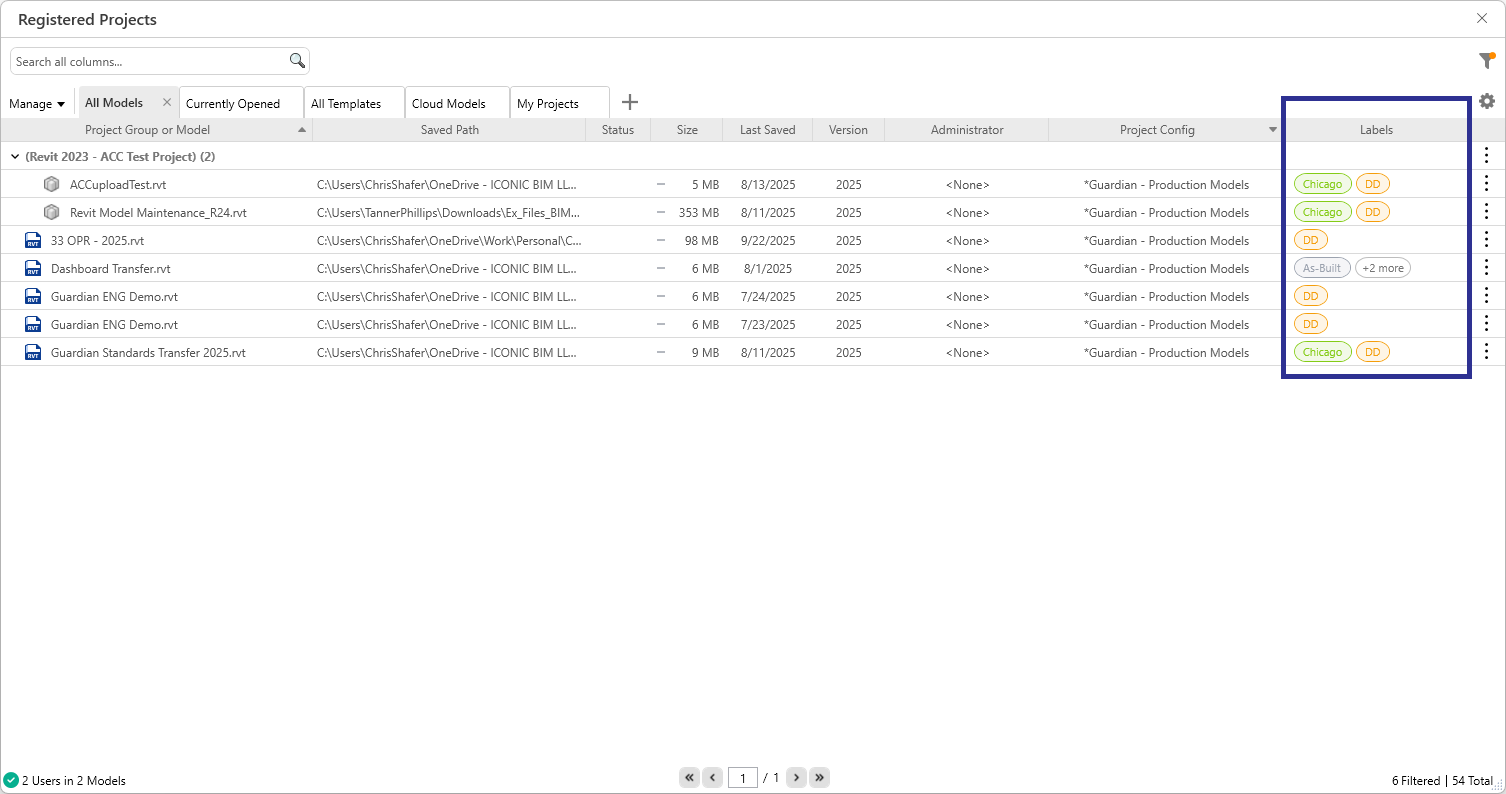
Managing Labels from Registered Projects
You can apply Labels to models and filter by existing labels directly in Registered Projects.
Add a Label to Projects Manually
Open the kebab menu for a model, or right-click the row (A)
Select Edit Labels (B)
Choose an existing label or create a new label by clicking the plus sign (+) (C)
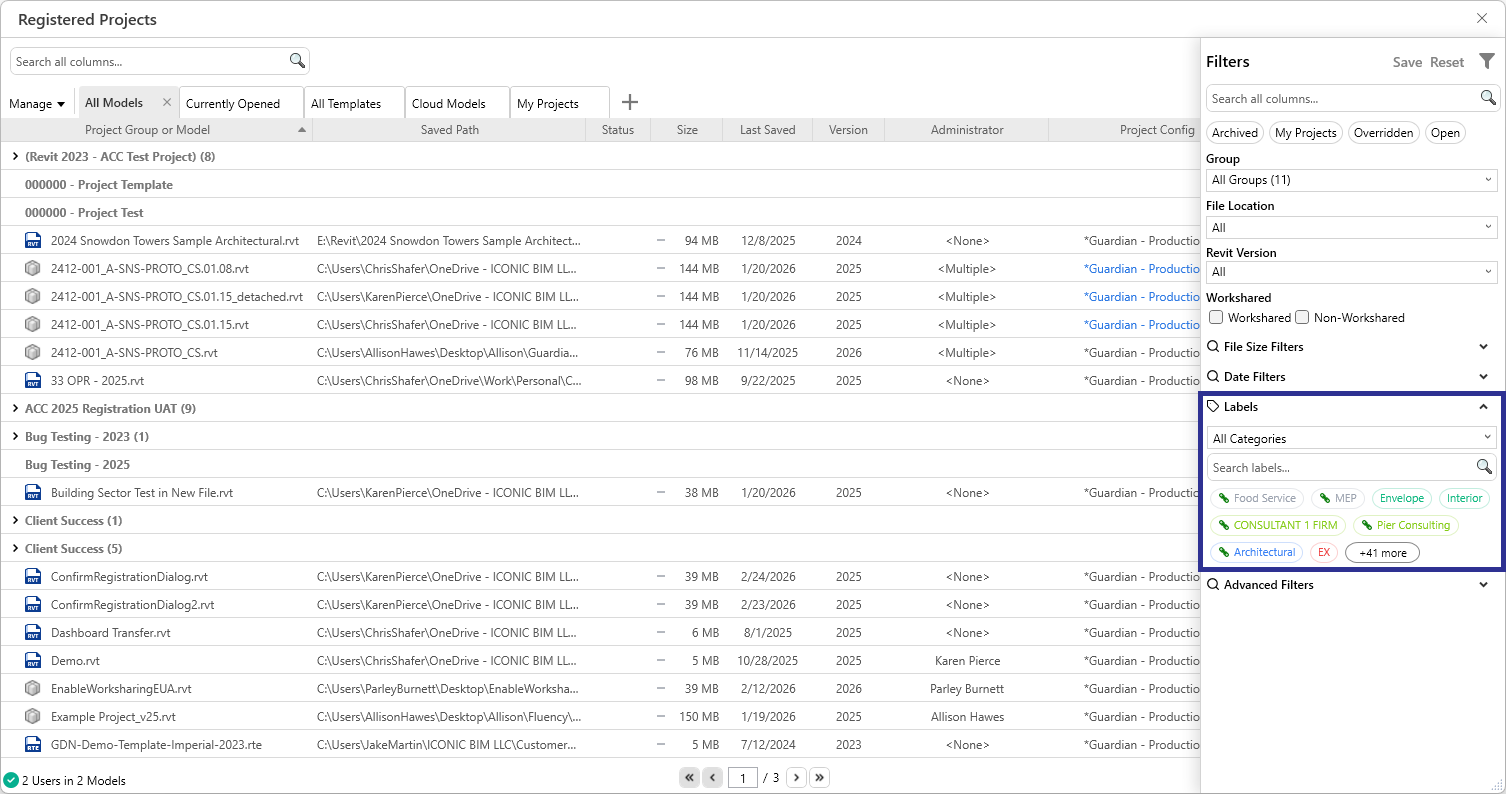
Filter by Labels
Labels can be used as filters in Registered Projects in two ways.
Option 1: From the Label Column
In the Labels column, click the label you want to filter by
Registered Projects refreshes to show only models with that label
To clear this filter:
Select the filter icon in the top-right corner
Click Reset
Option 2: From the Filter Panel
Open the Filter Panel by clicking the filter icon in the top-right corner
Expand the Labels dropdown
Filter by Label Category or search for a specific label
Select the label to apply the filter
Where Labels Appear
Once Labels are created and applied, they can be used throughout Guardian to help organize and filter project data.