All Commands Protections

Knowledge BaseUser Guidance & Protections
All Commands Protections

In This Article


All Commands Protections adds a whole new level of protections and training opportunities on all API available Revit commands. Company Administrators now have the ability to add nearly any native Revit command to Guardian’s User Commands, providing Monitor, Guide, and Prevent protections across all of Revit. This also provides administrators with valuable insights into how their users are utilizing Revit to model and document their projects.

With All Commands Protections, there is a greater level of customization for each Revit command. For each command; Message Title, before and after screenshots, Active View information, before and after selected Elements IDs, and default Command Messages can be set for each.

Why We Created This Feature

For years, Guardian has provided proactive protections for many Revit commands that contribute to projects going sideways. What we’ve learned from administrators is that Guardian is an effective tool at understanding how their users are utilizing Revit and for providing real-time training on a command-by-command basis. Now, we’ve opened Guardian to provide the traditional Monitor, Guide, and Prevent protections for all API available Revit commands. Administrators can truly understand how their users are modeling and utilizing Revit, while providing helpful guidance and training opportunities on all Revit commands.

Customize All Commands Protections

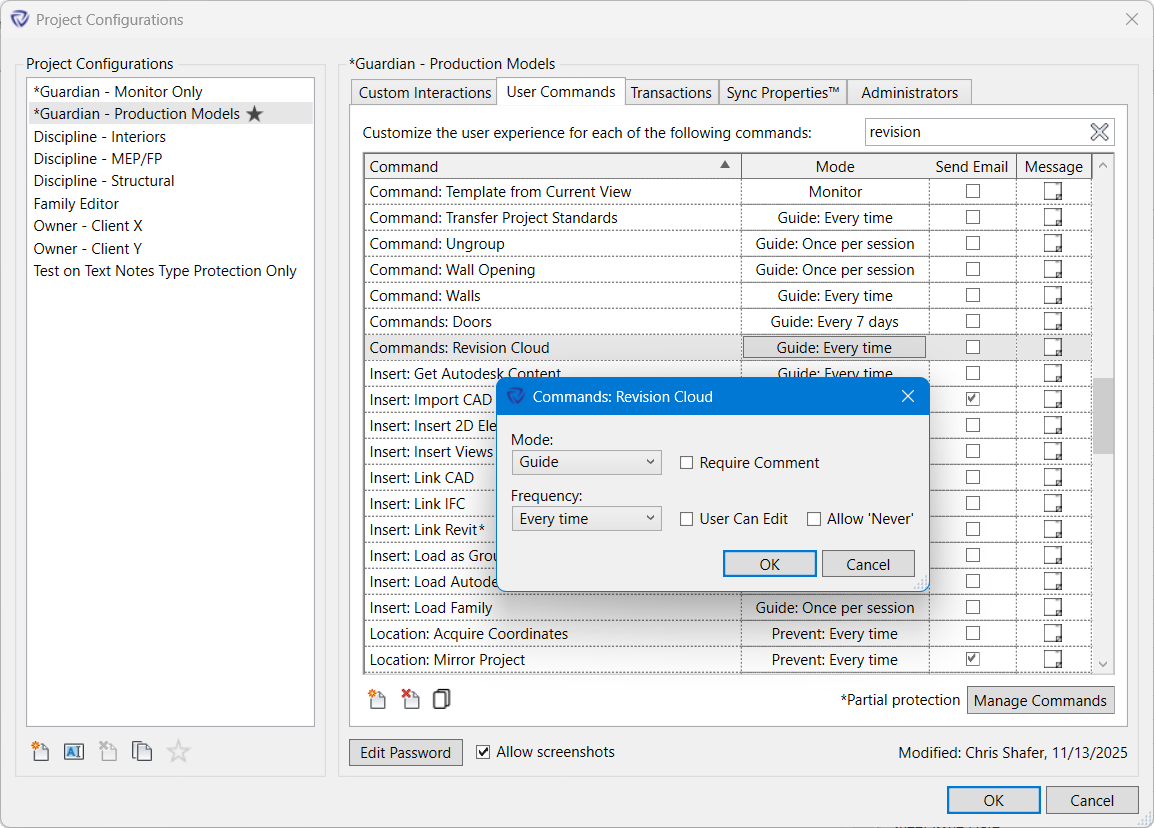
All Commands Protections must first be set up under User Commands within any Project Configuration by selecting the Manage Commands button. While accessible through the Project Configuration, the Manage Commands dialog functions globally and settings within Manage Commands are not specific to the active Project Configuration.

Project Configurations dialog

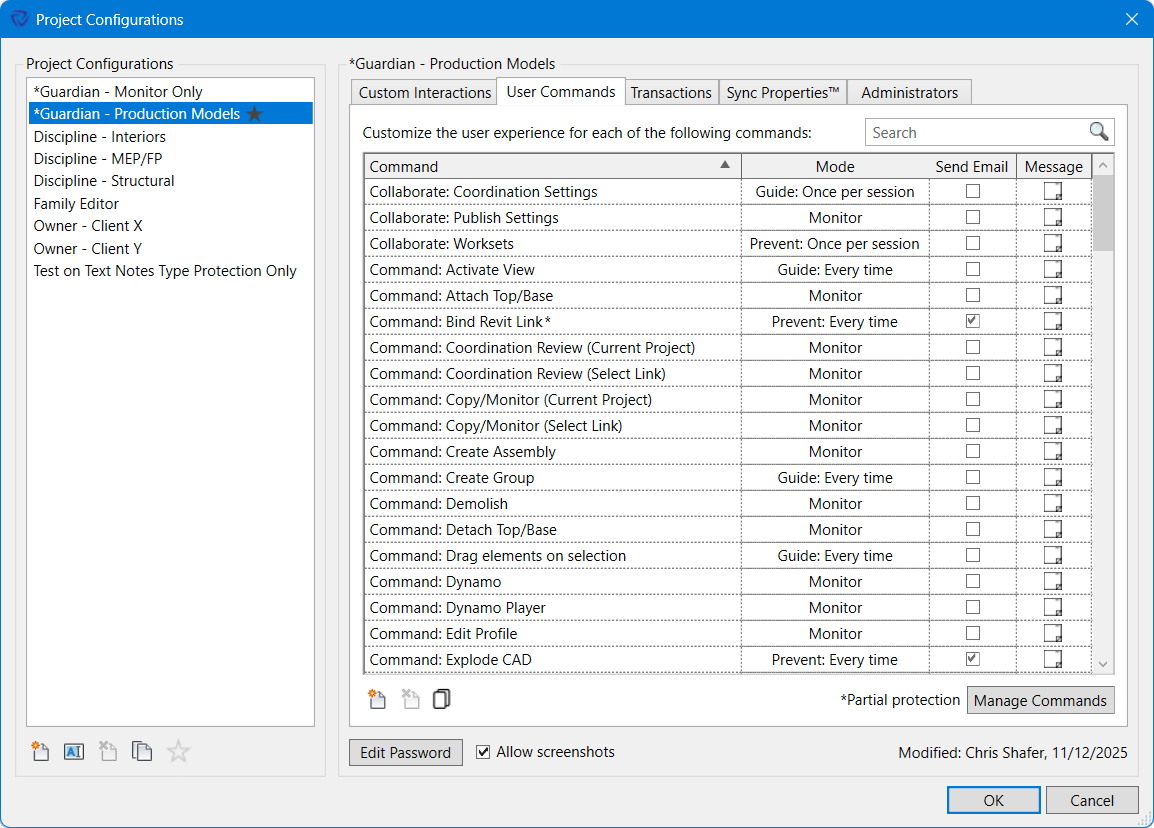
All existing commands will be shown when first opening the Manage Commands dialog. From the dialog, the following default settings can be established for each command:

Manage Commands dialog
  • Command Name: It is recommended to maintain the naming conventions already adopted by Guardian so there is consistency within the Backstage data set. For example: Command: Explode CAD utilizes the command type as a prefix and then the command name.
    • Most command type prefixes:
      • Collaborate
      • Command (Most common for modeling and annotation functions)
      • Insert
      • Location
      • Manage
      • Settings
      • View
  • Message Title: This is the title that shows up on the top of the Command Message.
  • Screenshot: Before and after screenshots can be captured on a command-by-command basis. Please note that any Project Configuration with the [Capture Screenshots] de-selected will override this setting. These screenshots will be available in Project Central and Backstage.
  • Active View: Provides, where available, the view name and view links in which the protected command was executed. This information will be provided with the executed command information in Project Central.
  • Selected Elements: Guardian captures the before and after element ID’s of those elements that were impacted by the executed protected command. This information will be provided with the executed command information in Project Central.
  • Default Command Messages: Set the default Command Message for each command that will be adopted when the new command is assigned to a Project Configuration or a new Project Configuration is created. Editing the Command Message here will not overwrite any existing Command Messages for that specific command.

Creating a New Command

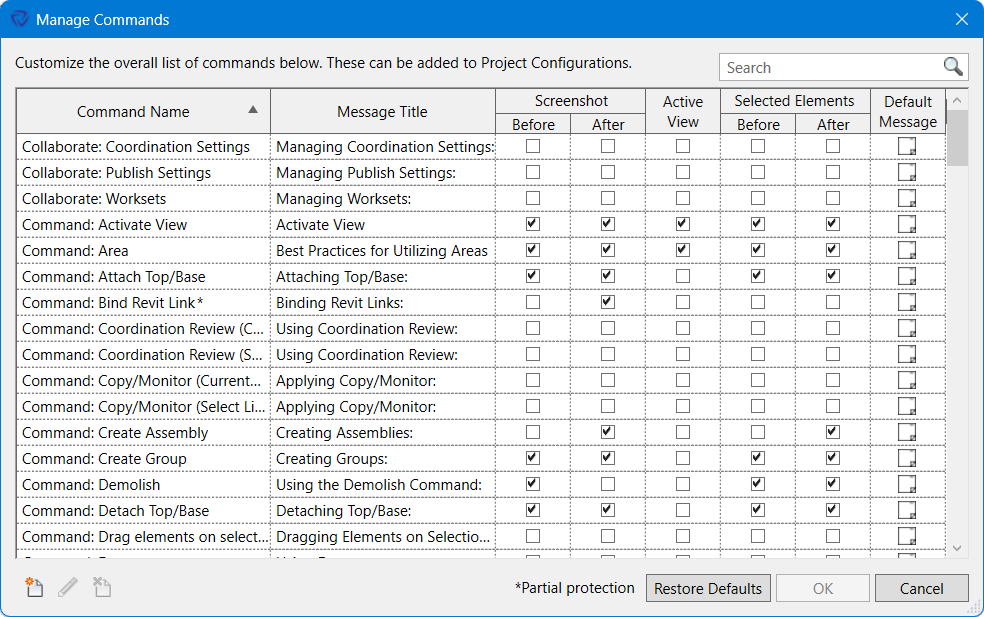
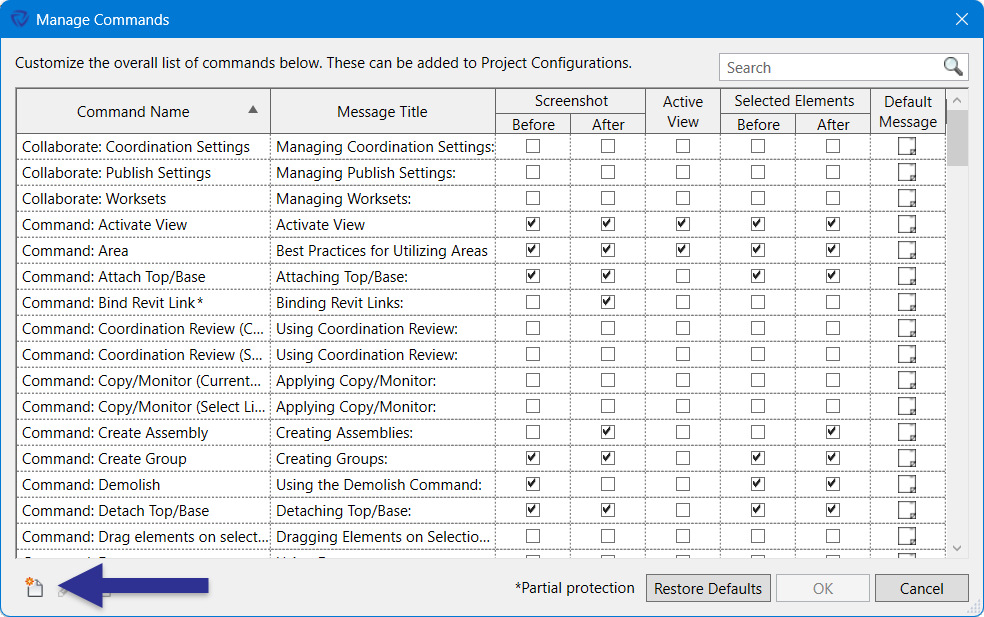
To create a Command from the available Revit postable commands, select the New button.

Manage Commands dialog with arrow pointing to New button

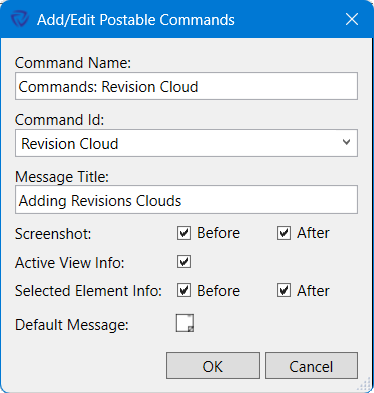
To configure the new command:

Add/Edit Postable Commands dialog
  1. Enter the Command Name: As mentioned above, please adopt the appropriate naming convention as this is what will show up in Project Central and Guardian Backstage.
  2. Select the Postable Command: All API available Revit commands, otherwise known as Postable Commands, are listed.
    1. Postable commands already used within Guardian will not be listed, such as the User Commands provided out of the box and User Commands available under Company Settings.
  3. Enter the Message Title: This is the title that shows up on the top of the Command Message.
  4. Select the Screenshots: Check the boxes if you would like to capture before and after screenshots.
  5. Select the Active View Info: Check the box if you would like to capture, where available, the view name and view links in which the protected command was executed.
  6. Select the Selected Element Info: Check the box if you would like to capture before and after element IDs.
  7. Edit the Default Command Message: Customize the default Command Message.

Adding the New Command to the Project Configuration

The newly created command will need to be added to the appropriate Project Configuration by selecting the New button under the User Commands tab.

Newly created Commands are not automatically assigned to Project Configurations to ensure protections are not inadvertently being added.

User Commands tab in the Project Configurations dialog

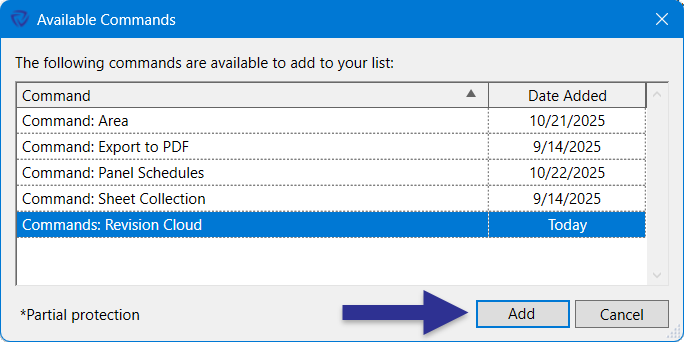
The new command will be listed in the Available Commands dialog and can be added to the Project Configuration by selecting the Add button.

Available Commands dialog

Once the new command is added to the Project Configuration, it becomes a User Command and the typical Monitor, Guide, and Prevent protections, along with frequency and comments, can be set. From there the newly created User Command can be copied to other Project Configurations.

New Command added to User Commands list

Have Questions?

We'd love to learn more about your challenges and explore a more proactive solution.

Get in touch
Guardian graphic